

Table of Contents
- Why Cleaning Your Makeup Brushes Matters for Your Skin
- How Often to Wash Makeup Brushes
- Choosing the Best Makeup Brush Cleaner
- Step-by-Step Process to Clean Makeup Brushes Properly
- How to Sanitize Makeup Brushes
- How to Dry Makeup Brushes Properly
- Common Mistakes to Avoid When Cleaning Brushes
- Signs It's Time to Replace Your Brushes
Last Updated: August 25, 2026
Why Cleaning Your Makeup Brushes Matters for Your Skin
Dirty makeup brushes trap bacteria, oil, and product buildup that transfer directly onto your skin with each application. For anyone with sensitive, acne-prone, or irritation-prone skin, this creates a direct pathway to breakouts and inflammation. The bristles harbour pathogens that trigger clogged pores and persistent acne. Artist Atelier's professional-grade brushes are designed with ultra-soft, hypoallergenic materials that minimise irritation, but even the finest brushes can't protect your skin if they're harbouring bacteria.
Regular cleaning is foundational for skin health. The difference between clean and dirty brushes shows up on your skin within days, your complexion improves, breakouts decrease, and makeup applies more smoothly. Beyond skin health, clean brushes perform better: makeup applies evenly, blending is easier, and you'll use less product. Proper cleaning extends brush lifespan significantly, keeping them soft and shaped for years rather than months.
How Often to Wash Makeup Brushes
Professionals who use brushes daily should clean them every day or every other day (the American Academy of Dermatology). For everyday users, washing once weekly is the baseline standard (the American Dental Association). If you have sensitive or acne-prone skin, consider cleaning twice weekly to minimise bacterial transfer.
Spot cleaning between deep washes prevents buildup. Give brushes a quick rinse under running water immediately after using cream or liquid products. Cream and liquid foundations, concealers, and cream blushes require more frequent cleaning because they set and harden on bristles. Powder products are gentler and require less frequent cleaning, though regular washing is still necessary.
If you share brushes with others, wash them before every use. Shared brushes directly spread bacteria, fungi, and skin conditions between people.
Choosing the Best Makeup Brush Cleaner
Gentle Shampoo vs. Clarifying Cleansers
A gentle shampoo designed for human hair works well for most makeup brushes. Look for formulas without harsh sulfates. Baby shampoo is popular because it's mild and cleans without stripping natural oils.
Clarifying shampoos are stronger and useful for deep cleaning brushes with significant buildup, but they're too harsh for regular use and will eventually damage bristles. Use gentle shampoo for weekly cleaning and reserve clarifying shampoo for occasional deep cleans.
DIY and Eco-Friendly Alternatives
Olive oil mixed with a small amount of gentle dish soap creates an effective cleansing paste. The oil dissolves makeup residue while the soap removes oil and bacteria. Coconut oil alone can remove makeup, though it's less effective at disinfecting. For a thorough clean, combine coconut oil with a tiny amount of castile soap.
Vinegar and water solutions (one part vinegar to three parts water) provide a disinfecting rinse after washing. Use this as a final rinse, not as your primary cleanser.
Step-by-Step Process to Clean Makeup Brushes Properly
Cleaning takes about 10-15 minutes per brush depending on buildup.
Step 1: Dampen and Rinse
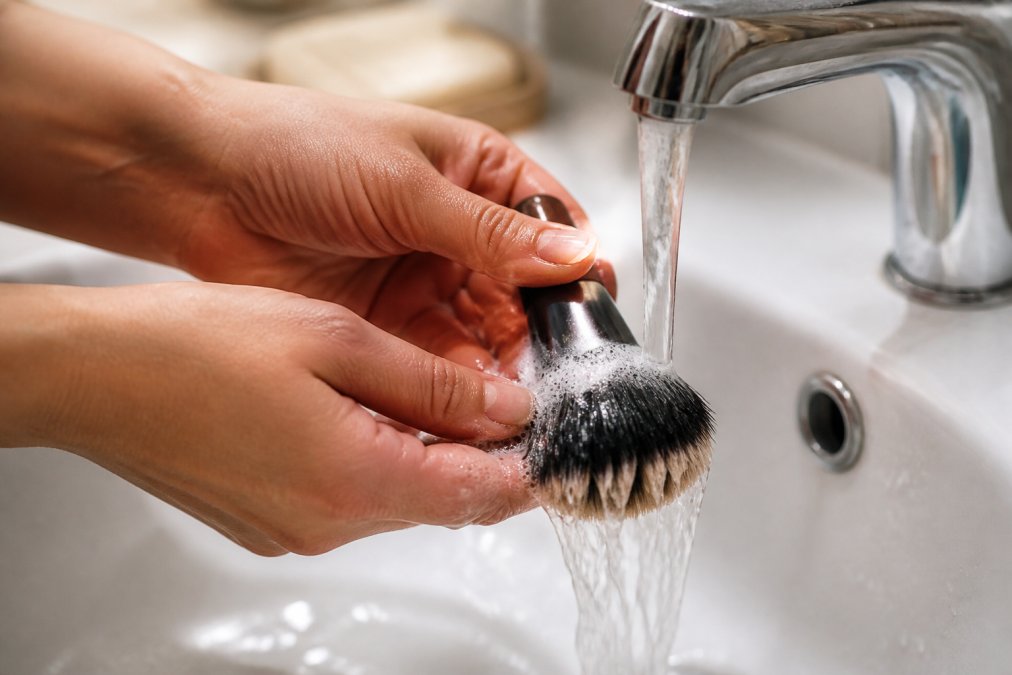
Run lukewarm water over the bristles, hot water damages bristles and strips natural oils, while cold water won't effectively loosen makeup. Hold the brush with bristles pointing downward to prevent water from running into the ferrule, which weakens the glue holding bristles in place. Rinse until the water runs clear.
Step 2: Apply Cleanser and Lather
Pour a small amount of cleanser into your palm or a small bowl. Swirl the damp bristles gently in the cleanser, using your fingertips to work it from the ferrule toward the tip. This dislodges makeup particles trapped deep within the bristle bundle. Swirl for 10-15 seconds, then rinse to check if more lathering is needed. Use gentle, circular motions rather than aggressive scrubbing, which damages bristles.
Step 3: Deep Clean the Bristles
For stubborn buildup, use a silicone cleansing mat with ridges that help dislodge makeup when you swirl the brush against it while wet with cleanser. If you don't have a mat, your palm works fine. Repeat this process 2-3 times for very dirty brushes, rinsing between rounds. Synthetic brushes can handle slightly more pressure than natural hair brushes, which are more delicate.
Step 4: Rinse Thoroughly
Hold the brush under running lukewarm water and rinse until the water runs completely clear. No soap residue should remain. Rinse from ferrule to tip, allowing water to flow downward. Gently squeeze excess water from the bristles without wringing or twisting.
How to Sanitize Makeup Brushes
Cleaning removes visible residue, but sanitization kills bacteria and fungi. For most users, washing with soap and warm water provides adequate sanitization. The combination of mechanical action, soap, and water removes the majority of pathogens.
For professional makeup artists working on multiple clients, additional sanitization is necessary. Spray cleaned bristles lightly with 70% isopropyl alcohol and let them air dry (the CDC). Don't soak brushes in alcohol, as it can damage bristles over time. For anyone with active skin infections, sanitize brushes before each use to prevent reinfection.
How to Dry Makeup Brushes Properly
Drying Techniques to Preserve Bristle Integrity
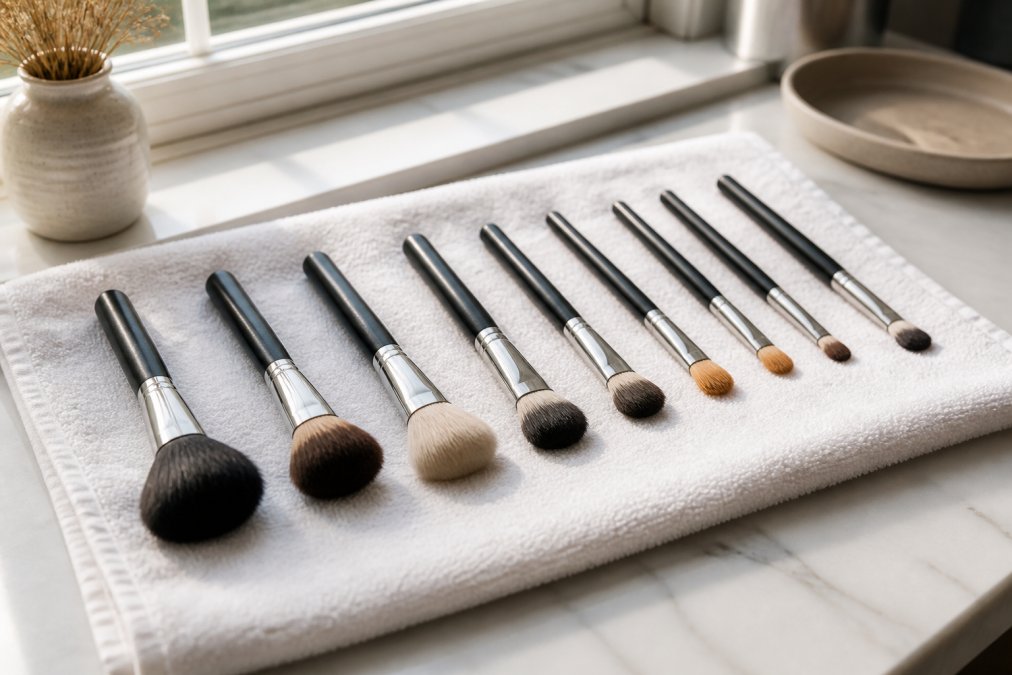
Never stand brushes upright while wet, water pools at the base, seeping into the ferrule and weakening the glue. Instead, lay brushes horizontally on a clean towel or drying rack with bristles pointing slightly downward. This allows water to drain away from the ferrule.
Air dry only. Heat from blow dryers or radiators damages bristles, making them brittle or melting synthetic fibres. Air drying takes 4-8 hours but preserves bristle quality indefinitely.
Brush-Specific Drying Hacks
For thick, dense brushes, reshape the bristles gently while still slightly damp to guide them back into their original shape. For fan brushes and specialty shapes, position them to dry in their intended form. Consider using a brush guard or hair net to keep delicate bristles aligned during drying. A hanging drying rack designed for makeup brushes keeps them organised with proper air circulation.
Common Mistakes to Avoid When Cleaning Brushes
Using water that's too hot strips natural oils from bristles, leaving them dry and brittle. Lukewarm water is always correct. Not rinsing thoroughly leaves soap residue that affects makeup application and irritates skin. Scrubbing too aggressively damages bristles, especially natural hair, gentle, circular swirling is more effective. Standing brushes upright to dry damages them over time as water pools in the ferrule. Using harsh detergents, body soap, or fragranced products can damage bristles and leave irritating residue. Finally, not cleaning frequently enough allows bacteria to accumulate to harmful levels. Weekly cleaning is the minimum; twice weekly is better for sensitive or acne-prone skin.
Signs It's Time to Replace Your Brushes
Bristles that shed excessively indicate structural failure. Losing multiple bristles during application means the glue is deteriorating. Bristles that become coarse, wiry, or rough instead of soft are past their useful life. Bristles that splay outward permanently and won't reshape when damp have lost elasticity. Visibly thinned bristles or bald spots where bristles have fallen out should be replaced.
Professional-quality brushes like those from Artist Atelier last for years with proper care. Budget brushes might last 6-12 months. When you invest in quality brushes, maintenance effort pays off through years of reliable performance.
Keeping your makeup brushes clean is the foundation of healthy skin and professional makeup application. Bacteria buildup, clogged pores, and bristle damage are entirely preventable with a simple weekly cleaning routine. Artist Atelier's handcrafted, hypoallergenic brushes are engineered to perform at the highest level, but that performance depends on proper maintenance. Clean brushes weekly, dry them horizontally, and replace them when bristles deteriorate. Your skin will thank you, and your brushes will perform beautifully for years.
Frequently Asked Questions
Q: What is the best way to clean makeup brushes at home?
A: Rinse brushes under lukewarm water, apply a gentle shampoo or dedicated brush cleanser to the bristles, and swirl gently on a cleansing mat or in your palm. Rinse thoroughly until water runs clear, then squeeze out excess water. For deep cleaning, repeat the lather and rinse process. Lay brushes flat to air dry completely before use. This method removes makeup residue and bacteria buildup while protecting bristle integrity.
Q: How often should you deep clean your makeup brushes?
A: Deep clean your brushes weekly if you use them daily, or every two weeks for occasional use. Spot clean after each use by wiping bristles on a tissue or cleansing mat to remove excess makeup. Weekly deep cleaning prevents bacteria accumulation, reduces skin irritation, and extends brush lifespan. For those with acne-prone or sensitive skin, weekly cleaning is especially important to avoid pore clogging and infection.
Q: Can I use washing-up liquid to clean my makeup brushes?
A: Washing-up liquid can work in a pinch, but it's often too harsh for delicate synthetic fibres and natural hair bristles. It may strip oils from the bristles, causing them to become dry and brittle over time. A gentle shampoo or dedicated brush cleanser is gentler on the ferrule and bristles, particularly for hypoallergenic brushes designed for sensitive skin. If you must use washing-up liquid, dilute it heavily and rinse very thoroughly.
Q: How can you tell if your makeup brushes are damaged by improper cleaning?
A: Signs of damage include bristles that feel stiff, frayed, or clumped together; bristles shedding excessively; a bent or damaged ferrule; or bristles that no longer hold their shape. Improper drying (standing upright with bristles pointing up) allows water to seep into the ferrule, loosening the glue that holds bristles in place. Air drying flat or at an angle preserves bristle integrity. Once bristles are severely damaged, the brush should be replaced to maintain application quality and skin safety.
This article was written using GrandRanker