

Table of Contents
- What an Airbrushed Foundation Finish Actually Means
- How to Prep Skin for Flawless Makeup
- The Best Brushes for Airbrushed Foundation
- Step-by-Step Application Technique for a Seamless Base
- How to Prevent Foundation from Looking Cakey
- Common Mistakes That Ruin an Airbrushed Finish
- Conclusion: Build Your Minimal Kit for a Flawless Complexion
- Frequently Asked Questions
Last Updated: September 7, 2026
An airbrushed foundation finish is the result of meticulous skin preparation, precise tool selection, and a disciplined layering technique that deposits product thinly and evenly across the complexion. It is not about heavy coverage; it is about building a seamless, skin-like veil that appears lit from within.
The texture of your canvas dictates the final result more than any brush stroke. The best brushes for airbrushed foundation cannot compensate for dehydrated skin or a conflicting primer formula. Below, we break down how to achieve an airbrushed foundation finish, covering preparation, tooling, and troubleshooting.
What an Airbrushed Foundation Finish Actually Means
An airbrushed foundation finish is a complexion that looks diffused and smooth, with no visible streaks, pores, or texture, resembling the soft-focus effect of a camera filter. In practice, this means foundation sits on the skin as a unified layer rather than settling into fine lines or clinging to dry patches.
The finish is the product of three variables working in harmony: the skin's hydration level, the density and shape of your tool, and the viscosity of your formula. Professionals rely on thin layers and buffing motions rather than sweeping strokes, aiming for optical blurring through sheer, buildable coverage that lets your natural undertone show through.
Many assume an airbrushed result requires an actual airbrush gun or a full-coverage foundation. Neither is true. A satin or radiant finish is achievable with a standard liquid formula and the correct application method, provided your skin prep is disciplined.
How to Prep Skin for Flawless Makeup
Proper skin preparation determines whether your base will last or slide off by midday. The objective is a smooth, slightly tacky surface that foundation can grip without emphasising texture.
Begin with a clean, hydrated canvas. A common mistake is applying makeup over skincare that has not fully absorbed. Wait at least five minutes after your moisturiser before starting your base. If you use a facial oil, apply it sparingly and allow it to sink in completely.
Primer selection must align with your foundation's base. A silicone-based primer creates a velvety, pore-blurring surface, but it will repel a water-based foundation, causing it to bead and slide (the American Academy of Dermatology). Check the first few ingredients of both products; if they do not share a dominant base, switch one.
The Best Brushes for Airbrushed Foundation
The best brushes for airbrushed foundation are dense, synthetic, and shaped to press product into the skin rather than drag it across the surface. Synthetic bristles are non-porous, meaning they do not absorb the liquid formula, allowing nearly all of the product to transfer to your face (peer-reviewed research).
Foundation Brush Shapes and When to Use Them
Brush geometry directly influences coverage and finish. A rounded, angled head, such as the Foundation Brush from Artist Atelier, follows the natural curves of the face, reducing dragging and streaking around the nose and jawline. At 19mm, it offers quick coverage while retaining precision for the hairline.

For a flawless, full-coverage finish, a flat, straight-cut square head is the professional's choice. The Flawless Foundation Brush features an ultra-dense structure that tapers finely at the tips, ensuring foundation adheres to the skin without absorbing into the bristles. Its density allows a stippling motion that presses pigment into pores for a seamless base.

Step-by-Step Application Technique for a Seamless Base
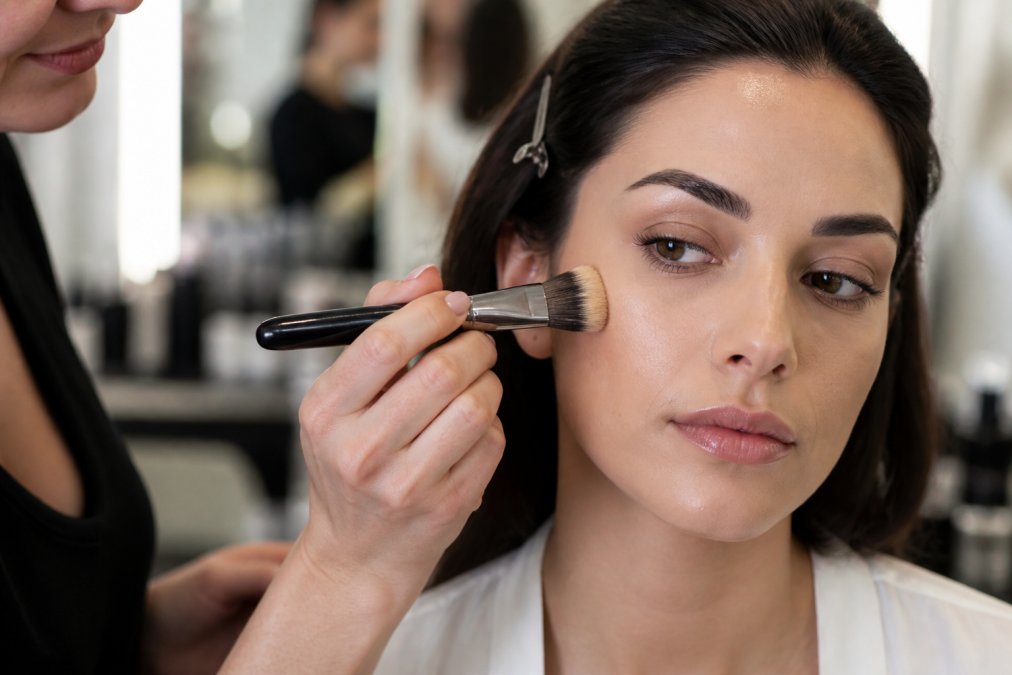
Mastering the application technique for a seamless base requires a specific hand motion: pressing and bouncing, never dragging. This deposits pigment into the skin's micro-crevices rather than swiping it across the surface, which creates streaks.
- Dispense a pea-sized amount of foundation onto the back of your hand. This allows you to control the quantity and warms the product slightly, improving its spreadability.
- Dot the foundation onto your face in five points: forehead, nose, left cheek, right cheek, and chin. Avoid applying directly to the centre of the face in large blobs.
- Begin buffing with your dense brush using short, circular motions, starting from the centre of the face and working outwards towards the hairline and jaw. This pushes the product into the skin, creating a pore-blurring effect.
- Build coverage in thin layers. Rather than applying a second heavy coat, apply a second thin layer only where needed, such as areas of redness or hyperpigmentation. This buildable approach prevents cakey texture.
- Blend down the neck using the residual product left on your brush to avoid a visible demarcation line.
How to Prevent Foundation from Looking Cakey
Cakey foundation is rarely the fault of the formula alone; it is the consequence of applying too much product to a poorly prepared surface. The most effective way to prevent foundation from looking cakey is to embrace thin layers and allow each layer to dry down before adding the next.
A 'cakey' finish is not a single problem, it is a symptom of several distinct textural failures, each with its own cause and corrective. Here is how to diagnose and fix the most common culprits.
Pilling: The Ingredient Conflict
Pilling, those small balls of product that roll off your skin, is the number one enemy of a seamless base. It is almost never caused by the foundation itself, but by a conflict between the foundation and what lies beneath it.
Check the first five ingredients on your moisturiser, primer, and foundation. If your primer is silicone-based (ingredients ending in '-cone', such as dimethicone) and your foundation is water-based (first ingredient: aqua/water), the two will repel. The water-based foundation cannot adhere to the slick silicone surface, so it beads up and rolls away.
The fix is not to abandon either product but to layer them correctly. Apply silicone-based products only where you need pore-blurring, typically the T-zone, and keep water-based skincare and foundation on the cheeks and perimeter. If you use a silicone primer all over, switch to a water-based foundation, or vice versa.
Dry Patches and Flaking: The Hydration Mismatch
A cakey, textured finish on dry skin is not a sign of too much product, it is a sign that the skin's surface is not uniformly hydrated. When foundation is applied over dry, flaking skin, the liquid formula sinks into the dead cell layer and emphasises every raised edge.
A water-based, gel moisturiser containing hyaluronic acid (such as those with sodium hyaluronate) is more effective than a heavy oil-based cream for this purpose. The gel hydrates the upper layers of the epidermis without leaving a greasy residue. Apply it, wait five minutes, and press a damp sponge over the driest areas to smooth away residual flakes before foundation.
If you notice flaking mid-day, do not add more powder, that will make it worse. Instead, mist a hydrating setting spray (one containing glycerin or aloe vera) from about 20cm away, wait 30 seconds, and gently press the flaking area with your fingertip to re-adhere the product.
The Powder Trap: Over-Setting the High Points
Texture issues often stem from an over-reliance on powder. Setting powder is essential for longevity, but applying it too liberally can instantly undo the airbrushed effect. Use a fluffy brush to dust a minimal amount of powder only over the T-zone, where oil tends to break through, and leave the high points of the cheeks to maintain a radiant finish.
A common pattern among those who struggle with a cakey look is pressing powder into the entire face with a dense puff. This compacts the foundation underneath and creates a thick, mask-like layer. Instead, use a loose, finely-milled powder (not a pressed one) and tap the brush handle on the side of your hand to remove excess before applying.
The Environmental Factor: Humidity and Oil Breakthrough
A cakey finish is also a function of the environment. In humid summer months, or in centrally heated rooms in winter, the balance between your skin's natural oil production and your foundation shifts. If you have combination skin, your T-zone will produce more oil in humid conditions, which can break down the foundation and cause it to pool in pores.
Adjust your routine seasonally. In humid months, use a lighter, water-based moisturiser and skip the facial oil entirely. In dry, heated months, you may need to add a single drop of facial oil to your foundation before application to maintain slip.
Common Mistakes That Ruin an Airbrushed Finish
Many application errors are invisible until you view your makeup in natural light. Applying makeup under a single overhead light leaves shadows that cause you to over-apply product to areas that are actually well-blended. Position yourself facing a window or use a ring light to ensure even illumination.
Beyond lighting, two silent killers of an airbrushed finish are consistently overlooked: the state of your tools and the sequence of your product layers. Here is how to address both.
Tool Maintenance: The Dirty Brush Problem
A brush caked with old foundation cannot blend new product effectively; it drags, leaves streaks, and deposits yesterday's oxidised pigments onto your skin, muddying today's shade. The fix is a disciplined weekly routine.
Wash your foundation brushes weekly with a gentle, sulphate-free cleanser or a dedicated brush soap (the CDC). Work the bristles in the palm of your hand in a circular motion, rinse until the water runs clear, and reshape the brush head. Dry it flat on the edge of a counter with the bristles hanging slightly off the edge, drying upright allows water to seep into the ferrule, loosening the glue and causing shedding.
A dirty brush also harbours bacteria, which is particularly problematic for those with sensitive or acne-prone skin. If you use a damp beauty sponge, replace it every three months, as the porous material breeds bacteria even with regular washing.
The Layering Sequence: When to Apply Colour Corrector
Colour correction should also be applied before foundation, not mixed in, to avoid muddying the undertone of your base. A peach or salmon corrector for dark circles must be applied in a thin layer and allowed to dry for 60 seconds before foundation goes on top. If you apply foundation immediately, the two products mix and neutralise each other, leaving a grey cast.
Similarly, if you use a colour-correcting primer (such as a green one for redness), it must be applied only to the areas of discolouration, not all over the face. Applying a green primer all over will neutralise your natural undertone, leaving a flat, sallow finish.
The Over-Buffing Mistake
A less obvious error is over-buffing. Many assume that the more you buff, the smoother the finish. In reality, excessive circular motion creates friction, which heats the foundation and causes it to break down, resulting in a patchy appearance. The correct motion is a controlled press-and-roll: press the brush into the skin, roll it slightly to deposit the product, then lift and move to the next area.
The Lighting Check
Finally, always do a 'three-light check' before leaving the house. Examine your face in natural daylight (facing a window), under artificial indoor light, and in your phone's front camera. Each light source reveals different flaws: daylight shows patchiness, artificial light shows powder buildup, and the camera shows how the finish will appear in photographs. Correct any issue before you step out.
Conclusion: Build Your Minimal Kit for a Flawless Complexion
Achieving an airbrushed foundation finish is less about owning many products and more about mastering a repeatable, disciplined technique with a few high-performing tools. The core principles are consistent: prep the skin to a smooth, tacky state, select dense synthetic brushes that press rather than drag, and build coverage in whisper-thin layers.
Your kit does not need to be extensive. A rounded foundation brush for daily wear, a dense flat brush for full-coverage events, and a soft powder brush for setting are sufficient to handle every scenario. Artist Atelier's collection, handcrafted by master artisans in Seoul and made from ultra-soft, hypoallergenic materials, is designed around this exact minimal-kit philosophy.
If you are ready to refine your technique and elevate your daily makeup ritual, add the Finishing Powder Brush to your collection and experience the difference that professional-grade tools make. Get started with Artist Atelier and build a kit that delivers a soft, airbrushed finish every time.

Frequently Asked Questions
Do I need special tools to achieve an airbrushed finish?
Yes, the tool matters as much as the formula. A dense, synthetic foundation brush with finely tapered bristles is designed to buff product into the skin without absorbing it, which is what creates that seamless, airbrushed effect. Natural hair brushes absorb liquid foundation and can leave streaks, whereas a high-quality synthetic brush, like the Artist Atelier Foundation Brush, presses product into pores for a smooth, second-skin finish.
How does skin preparation affect foundation finish?
Skin prep determines whether your foundation sits on the surface or melts into the skin. Exfoliating two to three times a week removes dry patches that catch on brush bristles, while a lightweight moisturiser creates a smooth, hydrated canvas. Allow moisturiser to absorb for five minutes before applying primer and foundation. Skipping this step is the most common reason for a textured or patchy complexion.
How do I prevent foundation from looking cakey?
Cakey foundation usually comes from applying too much product too quickly. Start with a thin layer and build coverage gradually, using a damp sponge or a dense brush to blend. Only apply powder to the T-zone where you get oily, rather than all over. If you use a silicone-based primer, pair it with a silicone-based foundation to avoid pilling and separation.
What is the best brush shape for a flawless foundation application?
A rounded, angled brush head offers the most versatility for a flawless finish. The curve follows the natural contours of your face, allowing product to be buffed into the hairline, around the nose, and along the jaw without dragging. A 19mm to 25mm head size provides enough surface area for fast application while still offering precision for detailed blending.